The holidays are upon us and it’s time to gather with your loved ones. If you are anything like me, you want to capture those moments in pictures. I often forget to take my camera but always have my iPhone with me. I’ve decided it is time for me to learn how to use my iPhone camera indoors. Some photo ops are a one time shot and you don’t have the chance to redo it! There is more to it than just pressing the shutter button.
At my mom’s birthday celebration this past summer, everyone in my family forgot their camera. We all had iPhones and snapped away, photo after photo. All the photos taken outside came out decent. The pictures taken inside, not so much.
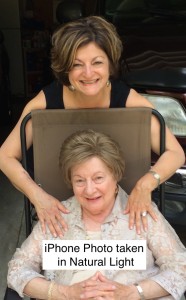

None of us really knew how to use our camera indoors where the lighting was dark. Outside, natural light does all the work for you. But once inside, you need to know how to set the camera functions properly.
This is just a brief overview of what your iPhone camera can do and how to use it correctly indoors.
Natural Light is King
Natural light is the best kind of light. Depending on how much natural light you have, you may be able to turn off overhead lights. Try that first by taking some test pictures if you are taking pictures near a window.
How to Take Pictures of Kids
This is a simple but great tip. Get down on their level! If your kids are opening their Christmas presents on the floor, get down on the floor and be at their level for your camera shots. It will make a huge difference.
Rule of Thirds
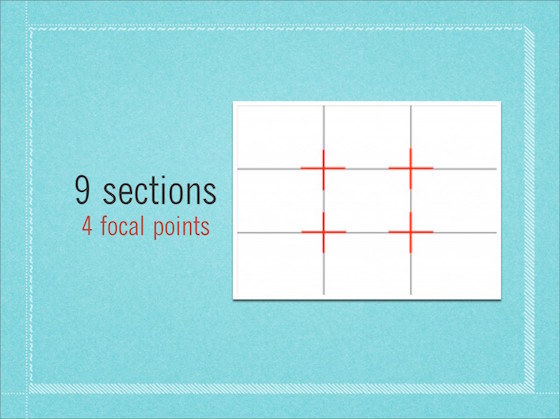
Are you familiar with the Rule of Thirds? The principle behind it is to divide the image you want to take into thirds, both horizontally and vertically, as shown in the diagram above from Digi Night Out.
On the iPhone, the camera has a grid dividing the screen into thirds with two horizontal lines and two vertical lines. These grids will help you align your photo properly.
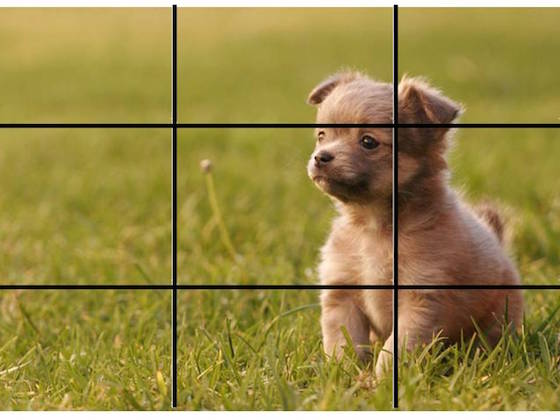
Think of the Rule of Thirds when composing your photo as shown above at Baboo Digital. Try to have the focus of your picture lie on one of the grid lines or their intersections. It will compose a better picture and be more balanced instead of having your subject completely centered.
Sometimes, though, rules are meant to be broken. You may want your picture centered such as when you are taking a group shot.
In iOS8, you can turn the grid on by going to Settings, scroll down to Photos and Camera and slide the button to the on position.
Look at the Background!
So often the photographer is concentrating so much on the subject that they don’t pay attention to the background. I have been known to have a palm leaf sticking out behind my head or some other odd object that ruins the photo.
What is HDR on the Camera?
HDR stands for High Dynamic Range. When on, it aims to add more dynamic range to your photograph. The dynamic range is the ratio of light to dark in the photo. In the case of the iPhone, your phone does the work for you when on auto mode. You just snap the photo and it will take one regular photo and one HDR photo.
Note: When you use the HDR setting, your phone will take a little longer to take the photo. It’s actually taking three pictures.
When to Use HDR?
Use HDR when you have low-light and backlit scenes. If you have too much backlight, HDR can brighten up the foreground.
If you are taking a photo outside, too much sun light can cause shadows on someone’s face. HDR can even that out.
In landscape photos, HDR can help you capture the contrast between the sky and the land.
When You Shouldn’t Use HDR
You should stay away from the HDR setting when you are taking photos with movement as HDR may make it blurry. Why? When in HDR mode the camera is actually taking three pictures. If your subject isn’t sitting still and moves in between those shots, the photo will end up blurry.
Setting the Exposure and Focus
The iPhone has auto settings for exposure and focus; however, I often find it is best to do that manually. It’s easy and quick to do.
- Tap the screen. A yellow box will appear. Start by tapping on your main subject.
- If the image appears too dark or too light, just swipe your finger up or down until it looks right.
- By swiping up, the screen will brighten. By swiping down, the screen will darken.
- You will see a sliding scale on the screen.
This is a new tip that I just learned and it has helped to improve my iPhone photos.
This is a new tip that I just learned and it has helped to improve my iPhone photos.
Sample Pictures with Different iPhone Camera Settings
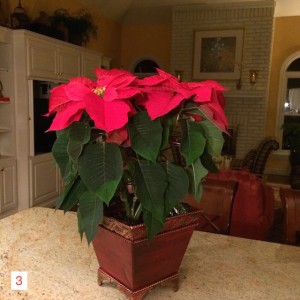
I decided to do my own experiment as I am a hands-on learner. Following are pictures that I took of the same poinsettia plant. The lighting in the room and my distance from the plant were the same in each picture. The photos have not been retouched.
I took the pictures with my iPhone 5s, each picture with a different setting on the camera.
Day Photos
These photos were taken in the morning. All lights were off. Below the collection of pictures you will see what the settings were for each picture.
1. Flash Off, HDR Off
2. Flash On, HDR Off
3. Flash Auto, HDR Off
4. Flash off, HDR On
5. Flash Off, HDR On, tapped darkest part of screen for focus
6. Flash Off, HDR Auto
7. Flash Off, HDR Auto, tapped darkest part of screen for focus
8. Flash On, HDR Off, tapped darkest part of screen for focus
9. Flash Auto, HDR Auto
Night Photos
I repeated the same exercise in the evening.
1. Flash Off, HDR Off
2. Flash On, HDR Off
3. Flash Auto, HDR Off
4. Flash Off, HDR On
5. Flash off, HDR On, Tapped darkest point on-screen for focus
6. Flash Off, HDR Auto
7. Flash Off, HDR Auto, Tapped darkest point on-screen for focus
8. Flash On, HDR Off, tapped darkest part of screen for focus
9. Flash On, HDR Off
Confused? Don’t be. Play around with the settings until you see what works for you and the setting you are in.
Do a Trial Run First
Before gathering people around for a photo, take a few test pictures to see what settings you need for your indoor pictures. That’s the beauty of digital photos. You can easily take some test pictures and then delete them!
What is Burst Mode?
The burst mode on your iPhone camera is ideal for taking pictures when you are shooting a moving subject. By holding down on the shutter button (home button) for slightly longer than normal, the iPhone will start to take one photo after another (approximately 10 photos per second). This is ideal for taking photos of kids and pets as it is often hard to get them to stand still. This helps you to capture the picture you want.
Panoramic Mode
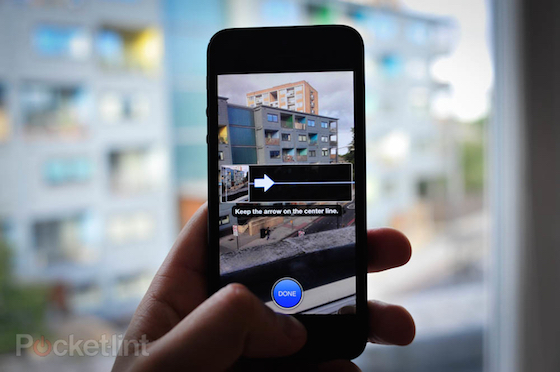
If you would like to take a picture that is wider than your screen, opt for Pano Mode. Here is a great tutorial for how to do that from Pocket Lint.
Take Your Charger with You
This is more of a reminder than a tip as you know that taking pictures will eat up your battery power on your iPhone. You will want to charge your battery while having Christmas dinner.
Quick Access to Your iPhone Camera
Don’t forget the fastest way to access your iPhone camera is to swipe up on the screen, even if it is in the locked position. This is good to know if you need to capture a picture in the moment!
Start Shooting
I hope these tips help you to capture wonderful memories this holiday season and in the new year! I’d love to hear your tips on how to use your iPhone camera indoors. Feel free to share in the comments below.






What great tips and advice, Elaine. I am not a very good photographer, but can take decent ones outdoors…now I can’t wait to try indoor ones, just in time for Christmas!!
These are great tips! Thanks for sharing! 🙂
Great tips! I did not know some of these. I will use the one to get to my camera fast often. Thank you!